We’re moving the filters to the top of the Schedule page. This in itself brings a few benefits but, specifically, it prepares the page to accommodate a number of great enhancements we’re planning for the Schedule page.
Since this is going to change how the most used part of Mediagenix On-Demand works, we thought we should tell you in advance ;) —but fear not, nothing has really changed much, things are just located in different places.
This note describes what is changing in full, and as usual you can contact support or your technical account manager for further clarification.
We’ve got a number of great enhancements to make in the Schedule page. We want you to be able to filter by metadata, business models, territories, devices and more. Also, we want you to be able to find schedule entries not matching a filter criteria.
In summary, we want you to feel the power of filtering!
However, having the filters in a sidebar on the right hand side of the Schedule page wouldn’t allow for adding many bells and whistles. So, as a first step towards a future world of amazing filters, pink unicorns and happy schedulers, we’re moving the filters to the top of the Schedule page.
The first thing you’ll notice is a new bar at the top of the Schedule page with the label “Show by”:

This bar is the default filter and allows you to filter by week, month, date or date. It works in exactly the same way as the old default filter.
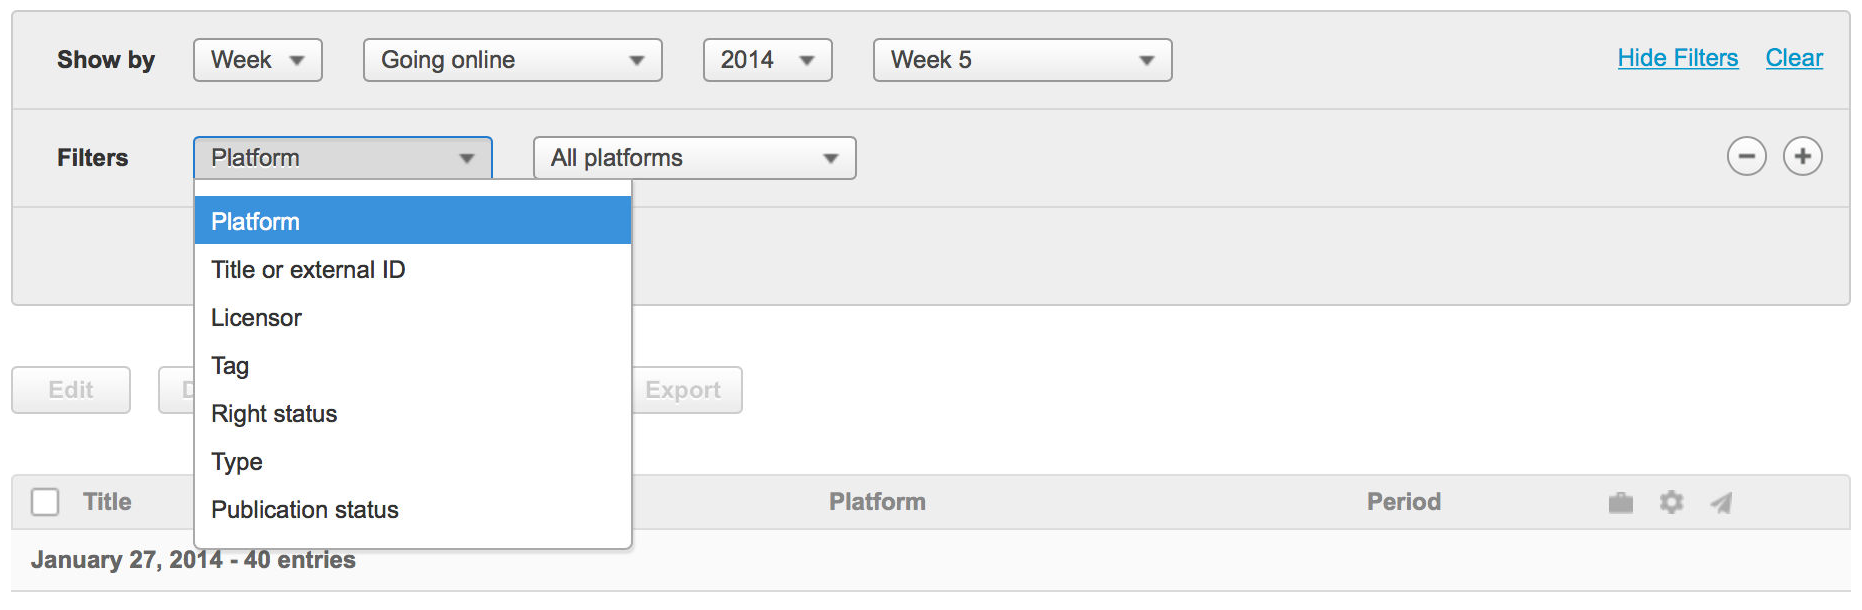
Now, where are the rest of the filters?, you may ask. Hidden they are, young Padawan, and you can show them by just clicking the “Show filters” link at the right of the filters bar.

You can now change the filter you want to use, by selecting it from the list of available filters:
And, you can have as many filters as you need by simply clicking the plus (+) and the minus (-) buttons at the right:
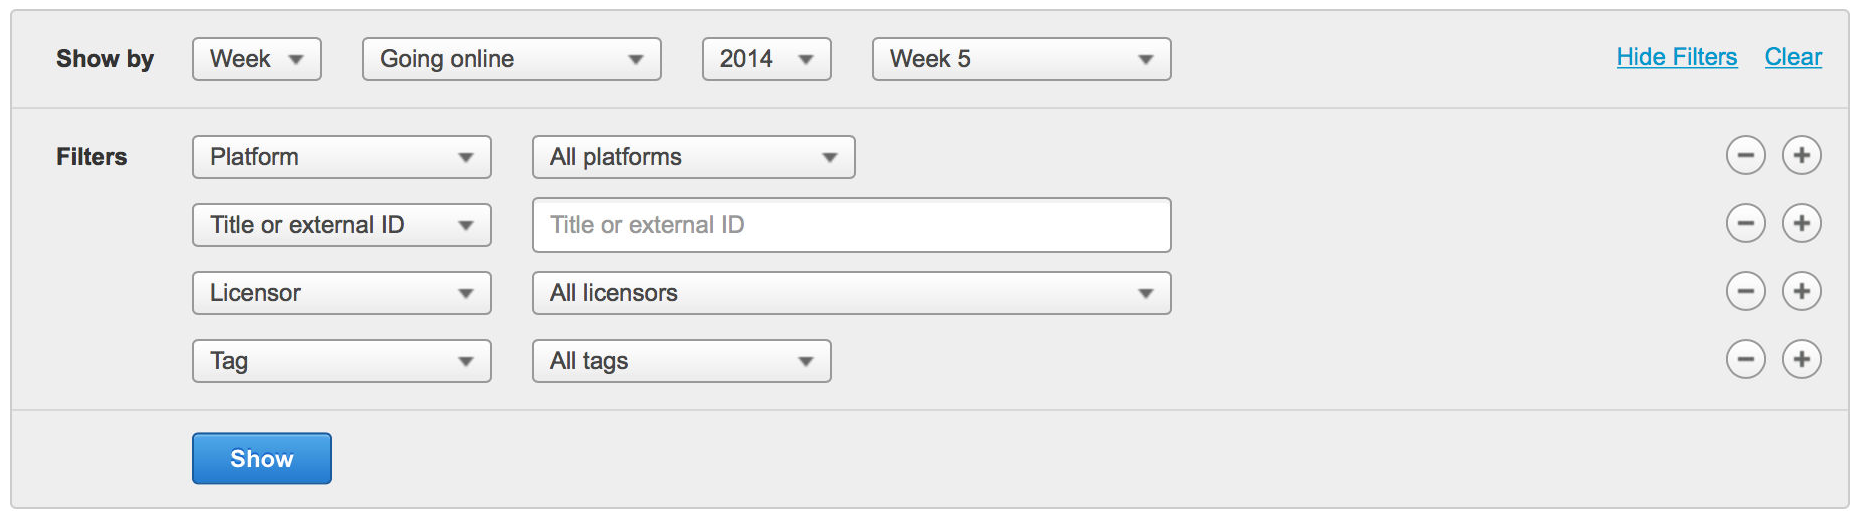
You just need to click “Show” now to get your schedule entries filtered by the criteria you set. Note that the Schedule page will only show entries that satisfy all of the filters.
I probably don’t need to explain the “Hide filters” and “Clear” links at the top, do I? They do what you’d expect: hiding the filters or clearing them. Finally, as it also happens in the old version, the schedule page will remember your latest filter configuration so that you don’t need to enter it over again.
So, things work basically like they used to but they are located differently in the page. This brings a couple of immediate benefits: the current filter configuration is more explicit now (i.e. only the filters you are using will be visible), and with the filters at the top, the schedule table is now wider and so, there’s more room to show extra long Platform, Title, and Asset names!
Moreover, the amazing stuff is what this change will enable us to deliver in the next couple of months. So, stay tuned!
Reference
movida#4072Title Schedule filters at the top of the page